
Here is a guide to create a Skool community, we create a skool community with you in this tutorial, so you can know what to expect
Do you have an audience but aren’t sure how to make money from it?
Skool is the perfect platform to transform your followers into a vibrant community and generate sustainable income.
Share your knowledge, connect with your audience, and get rewarded for your passion , all in one user-friendly space.
Instagram, Tiktok, Twitter, Pinterest or YouTube, Anywhere
With Skool, you can easily turn your followers into a thriving community and create a steady income stream.
Whether you’re a:
- Fitness and Wellness Guru
- Business and Finance Strategist
- Creative Content Producer
- Lifestyle or Personal Growth Coach
- Education and Skill Development Expert
- Spiritual and Self-Improvement Mentor
- Beauty and Fashion Trendsetter
- Travel and Adventure Enthusiast
Skool empowers you to build a strong community and earn recurring revenue from your dedicated followers.

This guide will show you how to make a Skool group by following along as I create one called ‘Guitar Geeks’!
the guide written off the community creation guide created by Ruben Lj .
Skool is an awesome platform that fixes many of the problems that other websites have. Some other platforms are hard to use or just boring — but not Skool!
Skool is like a combination of lots of awesome things!
- Easy chatting and games to keep your group fun!
- Super simple to make courses and schedule events!
- Easy to collect payments and subscriptions!
- It’s all in a really nice and easy-to-use design.
And guess what? You can start with a free trial to see if you like it!
Want to try it with me? Create your Skool account and follow along!
Here goes
Click to create your account to follow along , takes 2 minutes
but it’s no cost for you! If you use it, you can DM me or email me at [email protected], and I’ll help you set up your page!
Ready? Let’s get started!
After you register, here’s what to do:

Step 1: Set Up Your Skool Profile
- Click your picture and choose Profile.
- Add a photo and some details about yourself. This makes your profile trustworthy!
- Don’t forget to save everything.
Step 2: Search for Skool Communities
- Click the two arrows and choose Discover communities.
- Search for the name you have in mind. You’ll see if someone else already picked it. It helps you pick a special name!
- Now, click on Create a community! You’ll get to a page to start a free trial.
You get 14 days free, and then it’s $99 per month for one group. It’s cheaper than other platforms that take a big piece of your earnings!
Pick a name for your community. I’ll name mine Guitar Geeks.
To start the free trial, you need to put in payment info, but no worries — you can cancel during the trial if you want.
Step 3: Make Your Skool Community Awesome!
Let’s make your group look cool before inviting anyone!

Go to your community settings and click on General.
- Add a cover image and an icon. It makes everything look much better!
If you don’t have pictures, you can even use an image creator like ChatGPT! DM me if you need help with this part. - Add a short description so people know what your group is about.
- Decide if your group is public or private. This is to determine if people will be able join without payment or not .

Tip:
The most successful communities have a paid and free community , the free community funnels into the paid one
- Click Update Settings to save your changes.
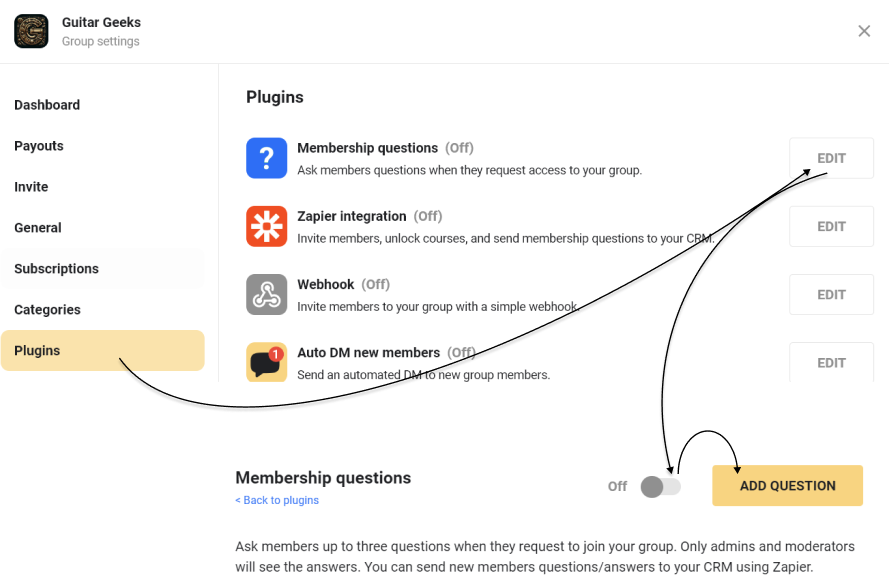
Optional Step: You can add membership questions if you want to know more about new people before they join, like their email or where they heard about you.
All done , You now have a Skool community !!
If you’d like to gather some information about your new potential members before allowing them in the community, you can enable ‘membership questions’. These are questions people have to answer to request access to your group.
- For fitness and health, questions like weight, email, and fitness goals might be great to ask.
- For business and finance, questions like financial goals, business experience, and investment interests might be helpful to ask.
- For content creators or artists, questions like preferred content type, primary platform, and artistic goals could be useful.
- For lifestyle or personal development, questions like current challenges, self-improvement goals, and areas of interest might be beneficial.
- For education and skill-based instructors, questions like teaching focus, preferred learning style, and current skill level could be insightful.
- For spiritual and self-improvement guides, questions like spiritual practices, self-discovery goals, and areas of interest could provide value.
- For beauty and fashion influencers, questions like style preferences, beauty routine, and favorite brands might be engaging.
- For travel and adventure influencers, questions like favorite travel destinations, bucket list goals, and recent travel experiences could be fun to ask.
Step 4: Add Some Content to your Skool Community !.
This is where you put your course , your learning materials ,what the members use to learn , study materials and all .
We need to add content so new members don’t see an empty group.
Courses
- Go to Classroom and click New Course.
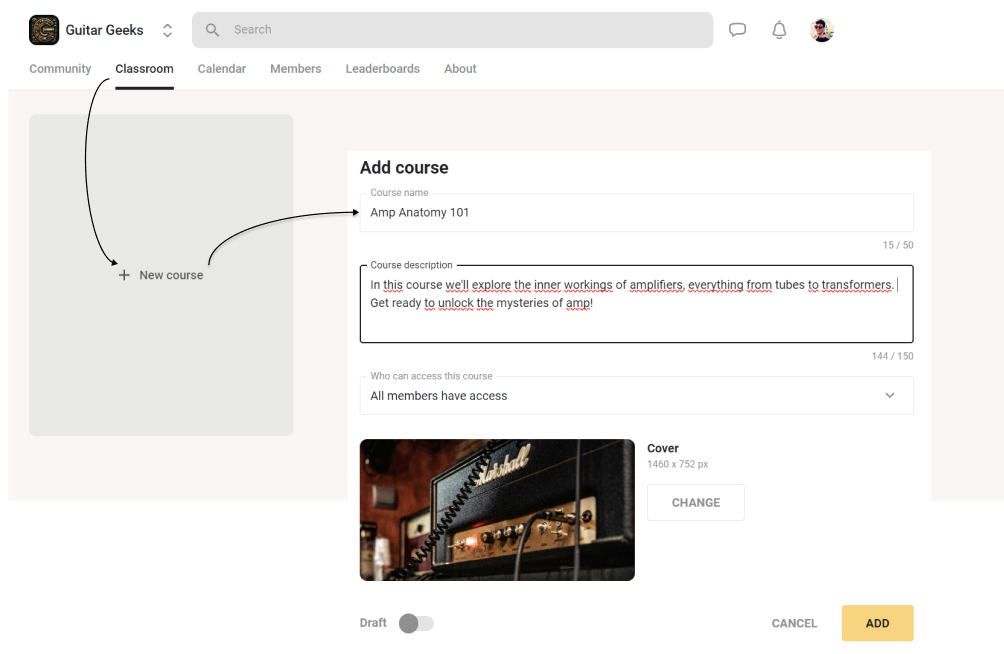
- Add the name, description, and a cover image for your course.
- Start with a draft if you want to finish everything before people see it.
Courses have sets and modules:
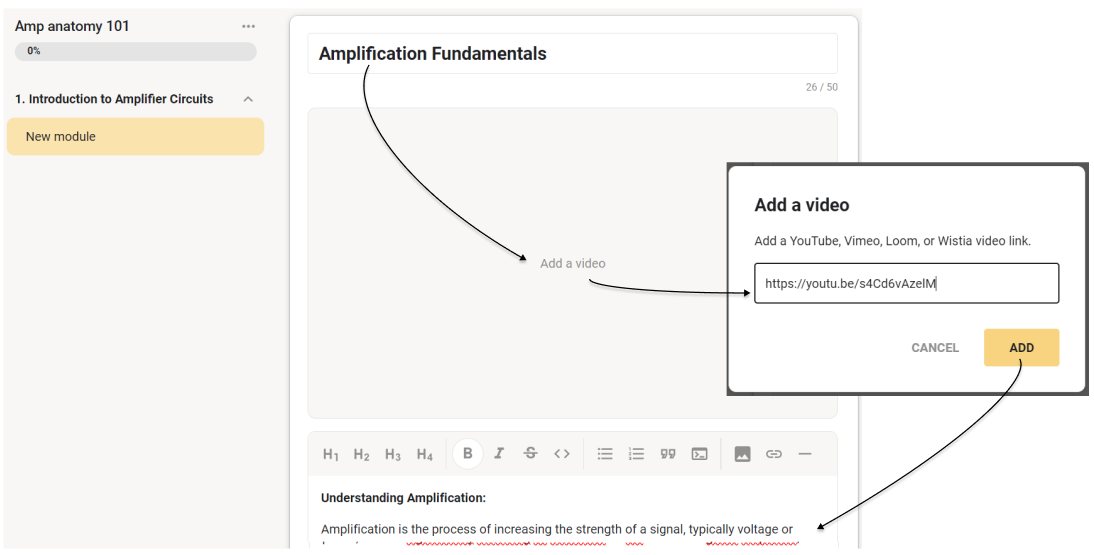
- A module is a lesson (it has a video and written content).
- A set is a group of lessons that go together.
Add videos by linking from YouTube, Vimeo, Loom, or Wistia. You can’t upload directly to Skool, so pick a platform that works for you.
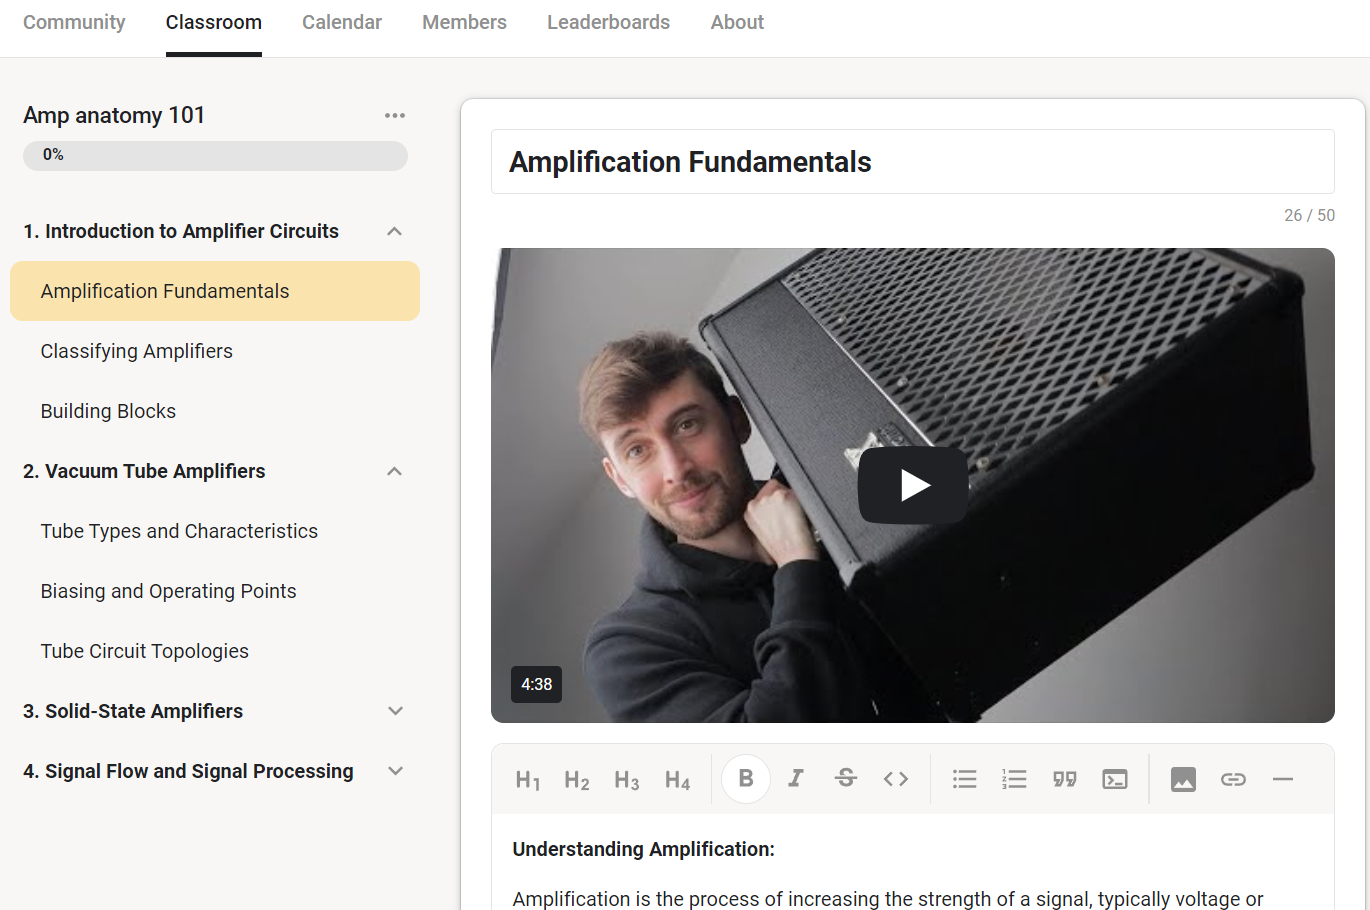
heard enough ?? Start your community now ??
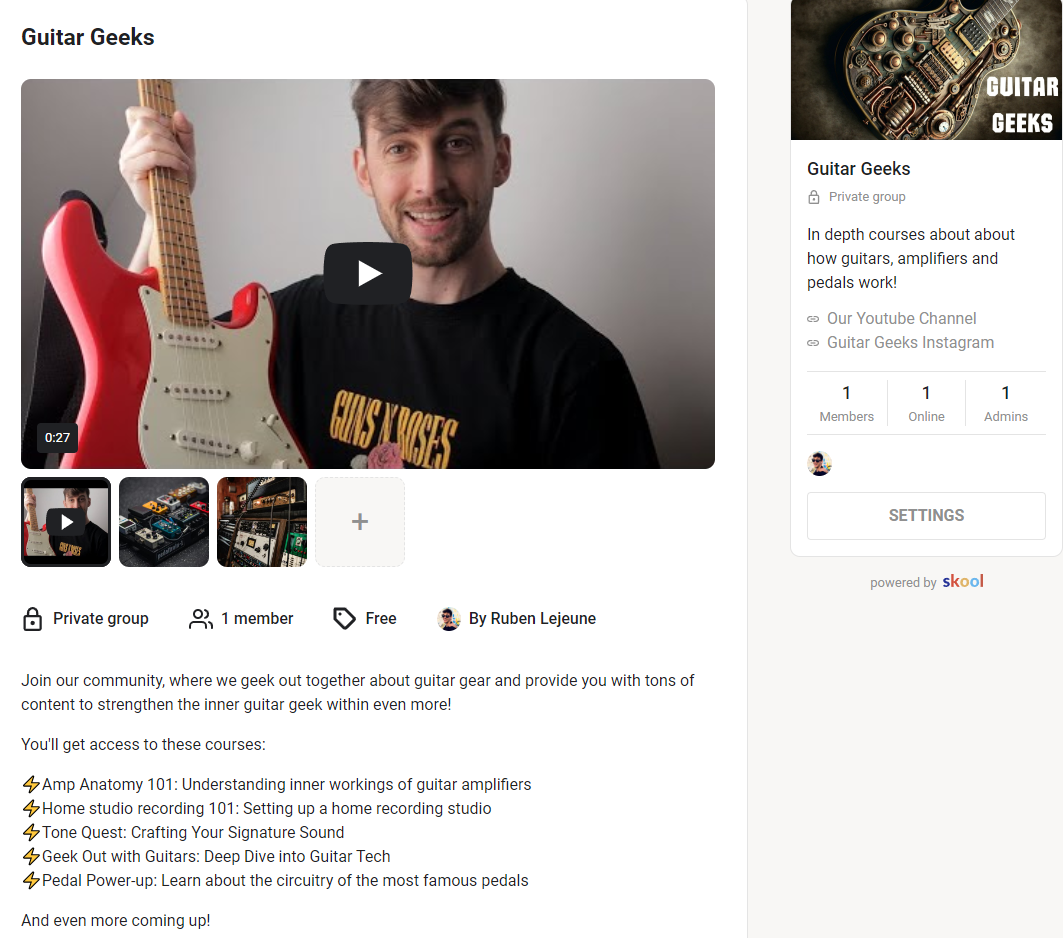
Final product should look like this .
Posts
- Posts are like conversations that happen under categories (or topics). When you start, there’s only one category called General discussion.
- Add more categories like Introduce Yourself or Announcements.
- Write your first post and pin it to the top so everyone can see it when they join.
Optional: You can set up an automatic welcome message for new members. Go to Plugins, turn on Auto DM new members, and write your message.
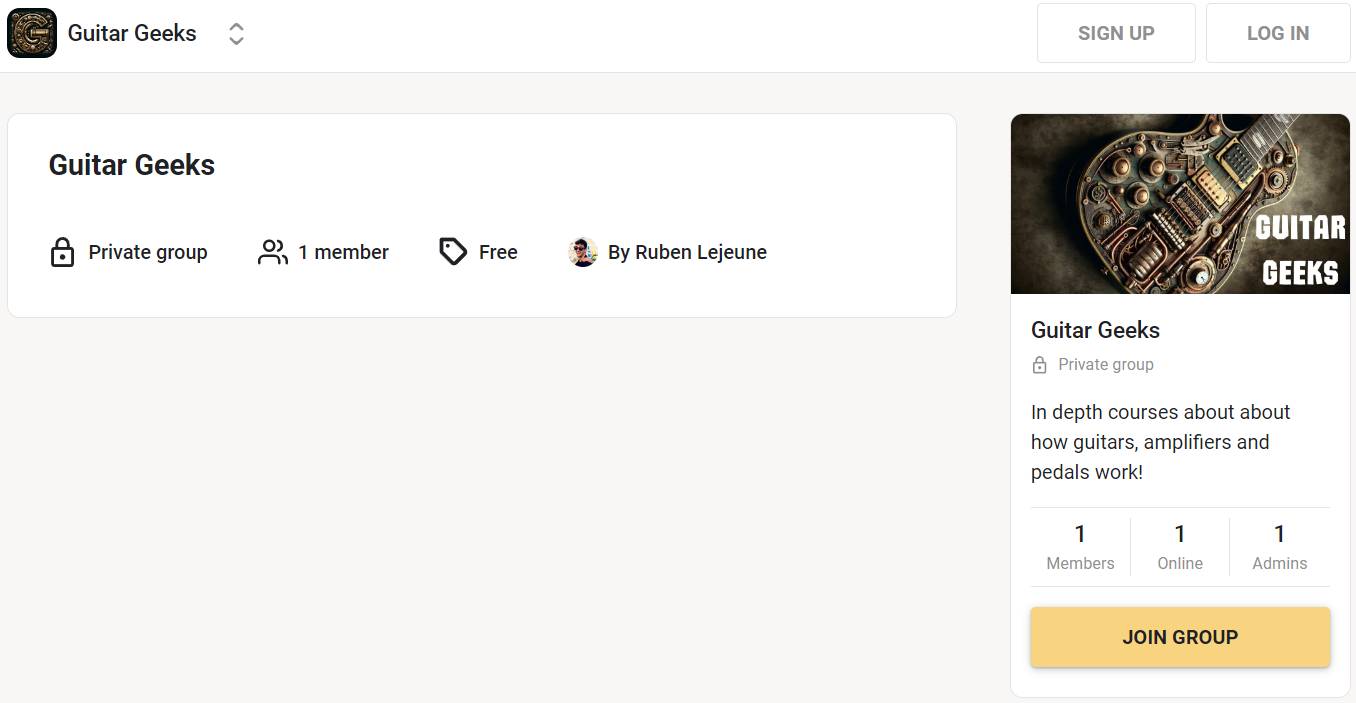
Step 5: Make Your Skool About Page Awesome!
This page is like your front door. It needs to be inviting!
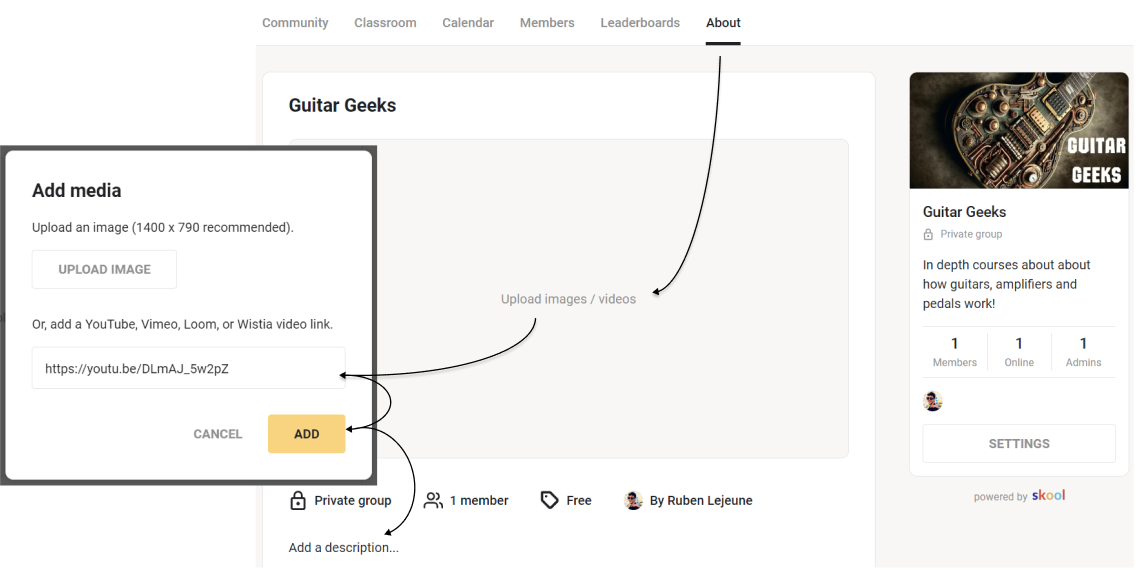
- Add images or videos to show what’s inside your community. A short demo video works great!
- If you have testimonials, add those too.
- Keep the description short and exciting. Tell people why they should join!

here’s the about page completed

Step 6: Set Up a Skool Subscription
(If You Want Skool Paid Community Members)
By default, the group is free. But you can make it a paid group whenever you like!
- People who join for free now can stay free forever unless they leave. You can use this as a reason for people to join early!
- In community settings, go to Subscription and click Add Price.
There’s a few of things that are good to know:
- People who join at a certain price , will stay at this price point as long as they stay in the group. You cannot increase the price for them. For example, someone who joined for free, will stay in the community for free forever, unless they leave it at some point. You can use this as an incentive for people to join early, as later they may have to pay (more).
- If you don’t have a big audience from social media, a common strategy is to start for free, deliver value and get a following, then once you have a nice community, you can ask for newcomers to pay a subscription.
- There is a 2.9% + 30 cents transaction fee on monthly sales. Meaning your subscribers will pay this on top of the monthly subscription amount of your choosing.
- Follow the steps with Stripe to set up your payments.
When you have paying members
Go to the ‘Payouts’ section in your community settings. to see when your next payout will be and how much will be paid,
Payouts happen weekly.
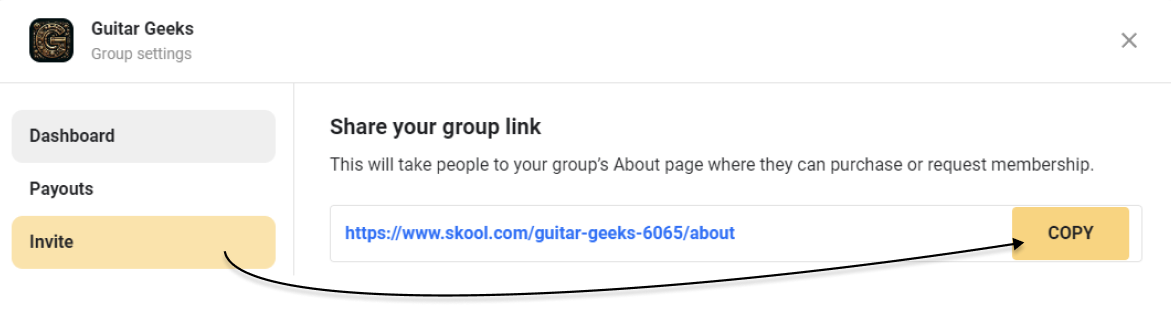
Step 7: Invite People!
- Go to community settings and copy the share link.
- Use social media or your email list to invite people.
- Want to invite someone to a paid group for free? Use the invite options so they can join without paying.
- you can invite people by sharing your link or importing using CSV files
Note: Your group won’t show up in Discover groups until you have at least one other member, some posts, an about page, a description, and you’ve waited 24 hours.
Congratulations!
If you’re still not sure if Skool is right for you, or you’re thinking about other options, Send a message in the comments, Lets plan through together.
Have Fun!